
http://en.wikipedia.org/wiki/HMS_Surprise_(1796)
I used to make a lot of cardboard ships when I was little, but they were not very authentic, since the bottom was made out of one flat piece and the sides of the hull also being one piece each, so there was none of the contour. Still the main material this time around is the same, namely corrugated cardboard.
A good detailed model ship can cost hundreds of pounds, but (in the spirit of Napoleonic prisoners of war, who made models from bone and hair, I thought I would try to make a convincing model with virtually no financial outlay, using rather stuff that was to hand.
The first step was to trace the blueprint, below.

(I also gathered a lot of photo references for similar ships, and ships of similar eras (such as USS Constitution, which is preserved in Boston, Massachusetts, and HMS Trincomalee, which is in Hartlepool, as well as other peoples' models of the Surprise, and the similar vessel in the movie.)
Anyay, having made tracings of the blueprint (at such a scale so as the hull ended up about 44 cm in length) I cut these out to use as templates. I also made tracings of the rib contours, and templates so that the contours and profile of the hull would be accurate.

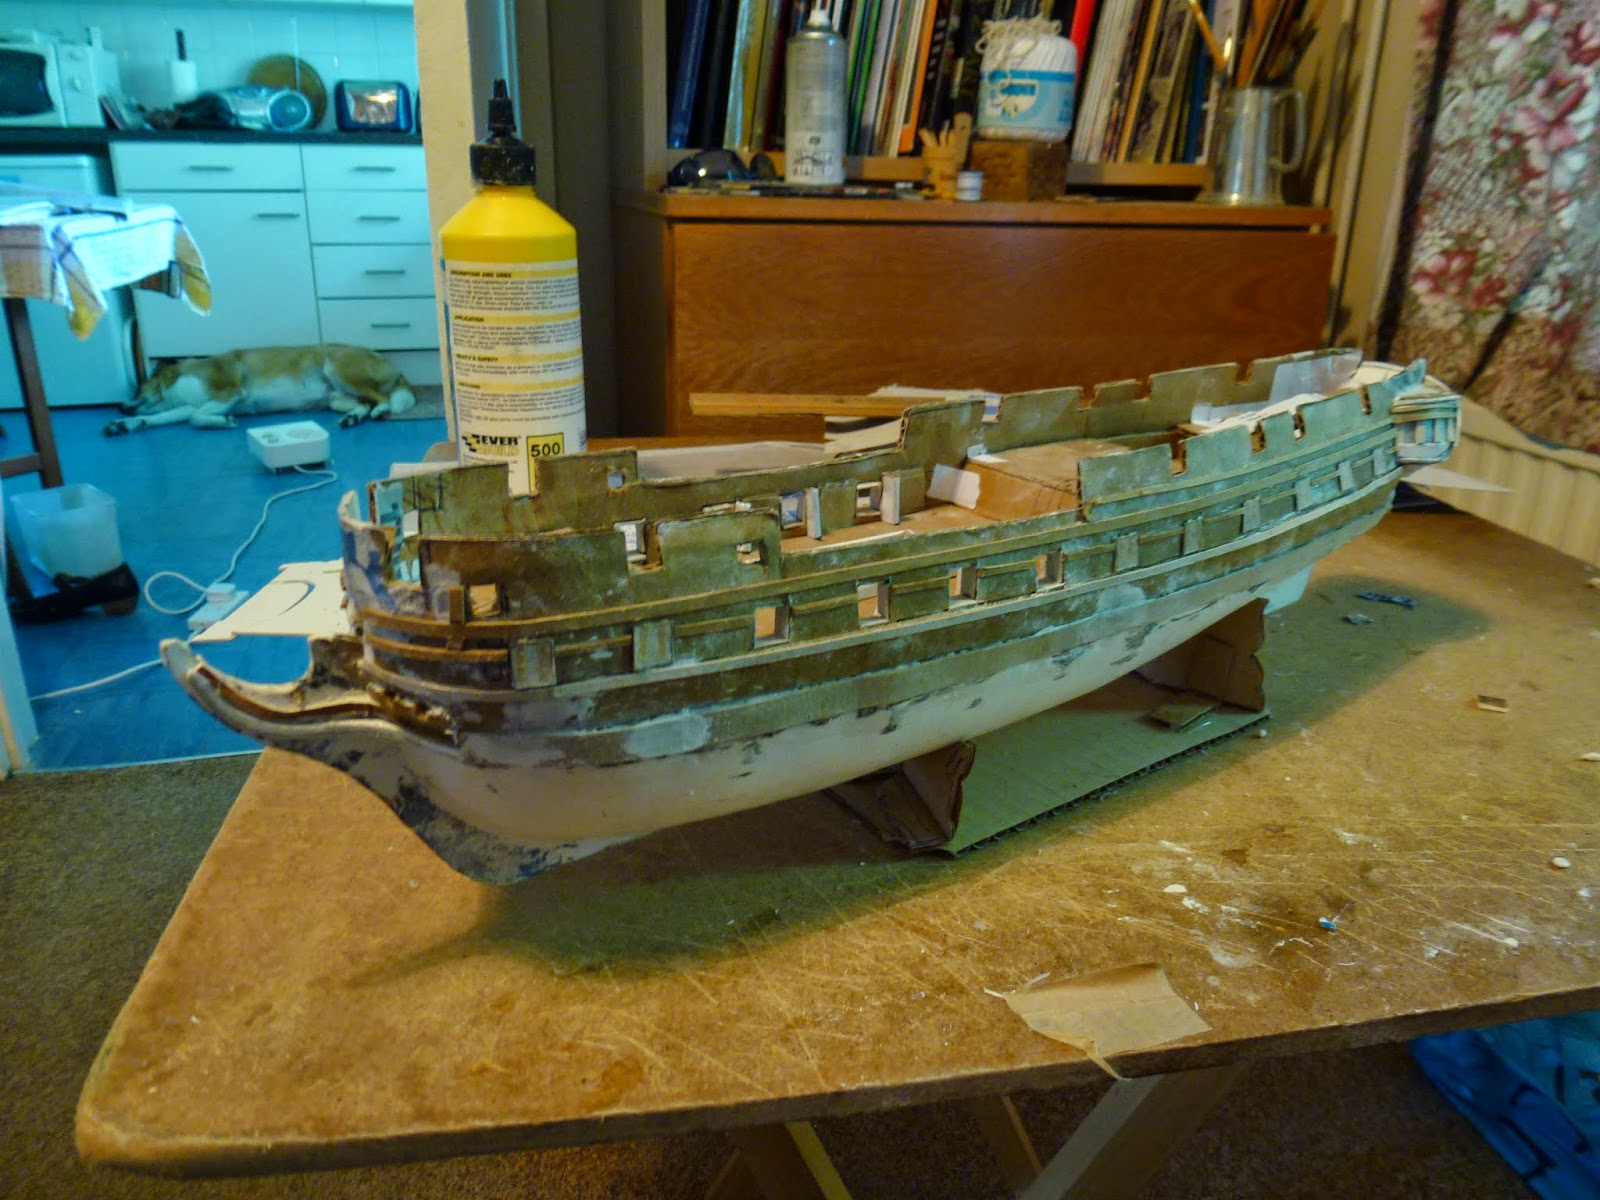
The card profiles cut out from the templates were slotted into the cut-out hull shape at appropriate intervals, fortunately marked on the blueprint. Space was allowed for the dip in the section of deck addded to keep the structure rigid. The dipped section will form the bit of the gun-deck that will be visible through the opening and hatches on the top deck (weather deck) when that is added. Making a model ship, by the way, is a good way to pick up some nautical terminology. The photo above also shows some of the templates for the ribs.

The frigate appears to have only a single flat deck on top, without a poop deck. Again using a template from the blueprint, a piece of card was cut out for the upper deck (actually I made two, so that there was one to practice with). Also seen here are some experimental stairways made from strips of thick card (mountboard, about 2mm thick) glued together. The piece of card below the piece forming the stair tread is set a little back from the one above.
I also made a temporary cardboard stand for the model to use while I am working on it. A wooden one will come later.

Here can be seen the hatch holes cut in the weather deck. They are edged with strips of mountboard. The strips across the hach are (if memory serves) double-thicknesses of mountboard. The tracing of the blueprint is also visible here, useful to compare the model to as it progresses.


I made a ship's wheel by cutting the shape out of mountboard with a stanley knife. The frame is also made from card, and it spins on a section of cocktail stick.

The upper parts of the sides of the ship (called gunwales where they extend above the deck) are added, made from strips of card. Extra length is allowed for where they curve around to meet at the front. A but of guestimation is deployed here. Also in the shaping of the various strips along the sides.
Also an experimental cannon is made from a section of straw with the ends made of das clay, on a gun carriage made from card. It is out of scale, though, so not used in the final. Provisional 'cats heads' (bits that project from the front to support the anchors) are also made. These will be replaced with more authentic versions with slots for pulleys towards the tips).

Card window-frames are made for the insides of the gun ports. these are done with thinner card, of the sort used for cornflakes boxes. (I used do a lot of cutting stuff out from cardboard boxes...)

Some 'planking' goes on the underside, strips of card going over the ribs. This is not intended to be seen in the final outcome, so there is no need to be too neat or to fill in all the gaps.

The card planking is covered over in papermahe. Torn up bits of newspaper are laid on in a couple of layers. I used diluted wood glue for this which seems to work, and dries nice and hard. However it is lacking something in smoothness of finish, the hull is all lumps and bumps at this stage.

I plaster over the bumpy hull using das clay. I also make the stern gallery, primarily going by the template, but also by existing examples such as that of HMS Implacable which is preserved in the National Maritime Museum. Several layers of card are used to form the details. A suggestion of decoration will also be made out of DAS. The bits that connect the stern gallery to the sidesof the hull are also made. Some silvery plastic strips left behind by the builders come in handy to suggest the glazed windows, formed of smaller panes. A provisional bowsprit is in place. The masts will be made from wooden dowel and sawn up old paintbrushes, eventually.
Those curtains are disgusting, I know...

The stern gallery stuck on, and more plastering done on the hull...
Adding various details , the raised strips along the hull, the gun port haches. The hatches are cut from card of middle thickness (not as thick as they would be if opened, since they are somewhat flush with the hull when closed. The hinges are made from tiny strips of masking tape, with tiny dabs of glue along them to suggest the bolts holding them on. Also some details around the bow. Holes are drilled where the anchor cables would extend, close to the keel, and re-enforcements are made around the lower parts of the holes.

Painting begins! Also some of the canons have been made. The canon barrels are made from sections of biro tube (the bit where the ink goes) with the end bits made out DAS clay. The wheels are made from smaller biro tubes cut into slithers. The deck is only positioned, at the moment, and it will be lower down when in place. Metallic silver paint is used on the chimney spout. Acrylic is used elsewhere over an emulsion base (except on the deck which only has an acrylic was, so retains a more matt finish and looks like untreated wood).

Black and yellow ochre are the predominant colours on the hull. I will not paint he gunwales until the deck is slotted into place, because they will have a capping piece, and the deck would not fit in if that were already added.

This shows the Bow sprit in place (not painted yet). Also the figurehead made of DAS clay and other work around the prow.
A mast has appeared, too, waiting to be painted.
I really should have taken progrss shots of making the masts, because they are quite complicated.
So I will backtrack, presently and include some drawn diagrams.
Bear with me.

Meanwhile I never liked those grilles cut out from bits of fly-swatter, as they were too plastic, and the square holes were too big. So I made some grilles out of match sticks, which look a little more authentic.


Looks great. I hope you provide detailed drawings and plans so I can make one myself.
ReplyDelete